Not that we don’t love training everything in our split (yeah, even legs), but man, there’s nothing like chest day. Combine a prominent muscle group that tends to develop quickly with the primal feel of lying back and pressing a heavy weight, and you’ve got yourself a fun day at the gym.
Even so, we can all use as much advice and guidance as we can get on crafting our pecs to their true potential. That’s where these five tips come in. They cover everything from the best way to start your workout (hint: it’s not benching) to unique exercises you may never have heard of before. Armed with these tips, your chest workouts should be more effective than ever.
1. Start With a Fly, Not a Press
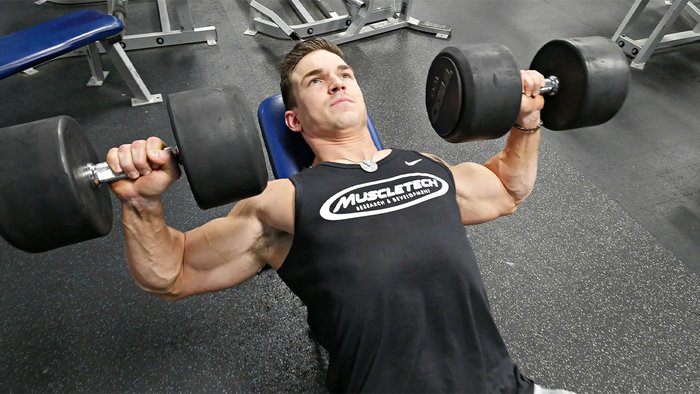
Starting chest workouts with a press seems intuitive, and it often becomes a habit. The thing is, though, doing flyes first makes more sense. Flyes gives you a deep stretch at the bottom and a high-quality contraction at the top, and the concentration involved in maintaining your form activates your mind-muscle connection right off the bat.
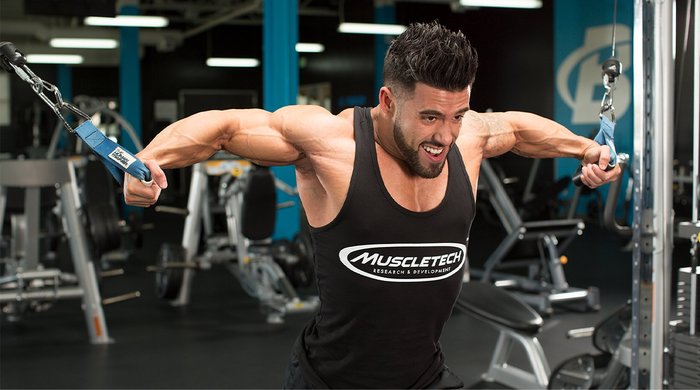
This isolation movement also pulls plenty of blood into the muscle, priming your pump. As for which fly you should do, just about any variation will work, from dumbbells at any bench angle, to cables, to a TRX Suspension Trainer, to the pec-deck machine.

Or, consider one of these unique fly variations:
Svend Press: This exercise is not about the weight. It’s about squeezing your arms together and forcefully contracting your pectorals as you press your hands together. With that in mind, go light; don’t try 45s, or even 10s, but start with 2-1/2 or 5-pound plates until you feel a contraction from your outer pecs to the middle of your chest with each rep. As a starting point, try 5-8 reps for 2-3 sets, holding the contraction for 10 seconds, then expanding that time over the following weeks and months.
Bodyweight Fly: This exercise will rock your pecs and your core. You’ll need some floor space and dumbbells or barbells that allow the plates to spin. If you don’t have access to either of those, use gliding discs or towels on a smooth floor.
To begin, get into a push-up position with your hands on the barbells or dumbbells (or discs or towels) instead of the floor, then slowly allow them to roll out to the sides as you lower your torso to the floor. When you get as low as you can handle, reverse the motion, flexing your pecs throughout to maintain control of your ascent and descent.
2. Press at Many Angles
The chest will develop exactly how you stimulate it, which is exactly why so many guys who do nothing but the flat bench walk around with thick middle pecs and flat-as-a-board upper pecs. It’s a bad look, but easily rectified by a steady dose of incline and decline presses.
If you’re working with a typical adjustable bench, you have more options at your disposal than you might assume, with every click higher or lower giving you a new angle to press from. (The difference between a 45-degree and a 30-degree incline is significant when it comes to muscle-fiber stimulation.) As you adjust the bench, keep one factor in mind: The higher the angle, the more the front delts fire. So, to help keep the focus on the pecs, pull down your shoulder blades and expand your chest as you rep.

Outside of the typical incline, flat, and decline barbell and dumbbell presses, here’s a unique variation to consider:
Single-Arm Flat Dumbbell Press: The typical press involves both arms, which allows you to handle more weight. This is a good thing, of course, but isolateral (i.e., single arm) presses have their value as well. Doing presses one arm at a time helps balance development between a stronger and weaker side, while also changing how the muscles fire (meaning more overall stimulation). As a bonus, doing the press isolaterally engages your core, too.
To begin this exercise, hold two dumbbells in the down position, then do your reps one arm at a time. Either alternate arms with each rep or do all your reps per set for one arm, then switch to the other arm.
3. Hold It to Hit It
As a rule, doing reps involves establishing a cadence by keeping the weight constantly moving at an even pace. You can also do one-second pauses at the peak contraction—or go a little crazier and do isometric holds. Try holding a contraction for 15-30 seconds. If you’re totally nuts, just hold on until you can’t hold on any longer.
Doing the isometric cable iron cross is a good way to subject yourself to some serious pec punishment. Perform a set of cable cross-overs per usual. At the end of the set, return your arms to the up position, loosen your grip on the handles and count to five. Now tighten your grip and pull the handles down to the finish position and hold them there for as long as you can. Leave just enough energy in the tank to be able to return to the starting position without the weights crashing down onto the stacks.
4. Put the Weight of Your Own Body to Work
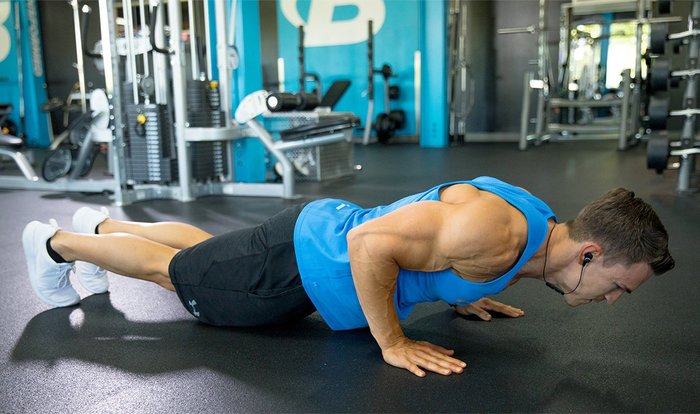
The push-up and dip are basic moves, but that doesn’t limit their effectiveness. Either one makes a great workout warm-up or finisher, and with some alterations, they can become extremely intense. Consider push-ups: You can elevate your feet on a step or bench to emphasize the upper pecs, or put your hands on a step or bench, with your feet on the floor, to hit the lower pecs. To add resistance, wear a weighted vest or wrap a resistance band around your back while holding the ends in each hand.
During a rep, you can also play with the tempo, slowing down or doing explosive ups, a technique in which your hands leave the floor (much like a clap push-up). You can even do multiple styles at once in one vicious dropset finisher: Start doing push-ups with your feet elevated to failure, then bring your feet down and do normal push-ups. When you hit failure again, put your knees on the floor and try to get a few more reps. Finally, stand up, lean against a wall, and go until you can’t go anymore.

Another finishing option? If you’re getting bored with regular push-ups, the following variant will help you dial in your pecs.
Clock Push-Up: Perform a traditional push-up, then rotate your body to the right in a clockwise direction using your hips as the pivot point. Perform another push-up, and rotate again. If you start at what would be the 12 on a clock, the next position would be 1, then 2, and so on until you make your way all the way around and end up facing the same direction as you started. For an added challenge, “hop” your body into position each time. On the second round, go in a counterclockwise direction, rotating to the left instead of to the right on each rep.
When it comes to dips, you target the chest by leaning forward instead of keeping your torso straight up and down, which works the triceps more than the chest. Once you’re proficient in bodyweight dipping, start adding weight. You can either use a weighted vest, a dip belt with plates attached, or get gnarly and hang some chains around your neck.
5. Take a Giant Leap
Sometimes the party maxim, “the more the merrier,” applies to chest training, too. By that we mean putting two or more exercises together, back to back, with no rest in between. MuscleTech-sponsored athlete and Team Bodybuilding.com member Abel Albonetti is a believer in this approach and is known to include a superset and triset as part of his routine.
Do what Abel does and work these combos into your next chest day:
Abel Abonetti’s Chest Combo Workout
The triset comes last in his chest workout. It’s all about putting the torch to any surviving muscles. Albonetti does the cross-overs to absolute failure, then immediately switches to the standing cable chest press—which is a little easier—and goes to failure again. Finally, he’ll put his feet up on a bench and do push-ups until he can’t muster a full rep. After the last push-up, he rests 45 seconds, then does the triset again, repeating it seven times in total. Don’t feel too bad if, by the last set, you can’t get even one push-up—or get up off the floor at all, for that matter. This triset is a killer.
from Weight Loss Insider https://ift.tt/2qBdfLd
via Best Weight Loss Supplement
0 comments:
Post a Comment